Sunday, March 22, 2015

Kids' Sewing Project

I don't know why, but I'd been procrastinating when it came to teaching my kids how to sew. I bought Dace a used Barbie sewing machine over a year ago and she'd asked to use it several times since then but I kept putting it off. But today, being the last day of March Break, seemed as good a time as any!

For my kids' first try at sewing, I had them make super simple "stuffies" out of fabric scraps. They drew their creatures on paper first, and then we cut them out to use as patterns, making sure to keep the shapes as basic as possible so they would be easy to sew. I still ended up helping a lot, but I think the girls had fun. We used my machine, and they were both a little scared of it--Violet couldn't even reach the pedal--but hopefully it was a good experience overall, and their dolls turned out pretty cute.

Dace's Bunny


Violet's Puppy


We totally cheated by gluing on all the features, including the buttons, but we'd had enough sewing for one afternoon...and there was a lot of clean up to be done!


(BTW, polyester fiberfill is perfect for creating Napoleonic hairstyles!)


I actually think Violet was a little on the young side for this project, although my friend Melanie's five-year-old daughter is already quite the accomplished sewer, so ya never know! I think I might do a basic pillow case with them next time, as the long, straight lines make it an ideal beginner project. 

Okay, this wiped-out mama is going to go relax with a glass of wine and an episode of House Hunters now...till next time!


Tuesday, February 3, 2015

Three Crafts for a Snowy (or Rainy) Afternoon

So, yesterday was a SNOW DAY for the girls (cue ear-splitting screams of joy), and I took it as the perfect opportunity to try out some of the ideas in this terrific book by fellow blogger www.soulemama.com. I got it from the library, and I have to say it is by far my favorite craft book that I've come across in a while.


I love it because of the beautiful, softly lit photographs and the fact that many of the projects are super easy and can be completed in an hour or two. There are some really cool, larger-scale projects that I want to try, but for now I picked three I thought the girls and I could handle in a day: papier-mache bowls, a fabric mouse pad and a "family heart" (AKA the cutest craft ever...scroll down to see what I mean).


I hadn't done papier-mache with the girls at home before and it turned out to be so much fun and way less messy than I anticipated. We made a homemade paste with a 1/2 cup of flour, 2 1/2 cups of water and a tbsp of salt heated in a saucepan over medium heat for 5-10 minutes, then allowed to cool down, and it was ALMOST enough for three medium-size bowls. As per the instructions in the book, we first wrapped our bowls that we used as molds in aluminum foil (making sure to smooth out wrinkles), then covered them in four layers of newspaper strips dipped in glue (covering the outside of the bowl only). For our final layer, we used a decorative paper. Then we left our bowls to dry in the sun.


By the end of the day, they were still not completely dry, so we will have to wait to paint the insides! Once they're dry, all you have to do is gently remove the aluminum foil from the bowl, and then peel it from the papier-mache. Stay tuned for those results!


Next up was this sweet little mouse pad. I had been looking high and low for one of these darned things, but who knew you can't find them anywhere anymore! (Oh, I'm sure Staples carries some basic black ones, but I wanted something prettier.) And for some reason I never thought of making one until I saw the instructions in this book. It's a great, simple project for a beginning sewer and a handy accessory for people like me who are allergic to the built-in touch pad on their laptop. ;)


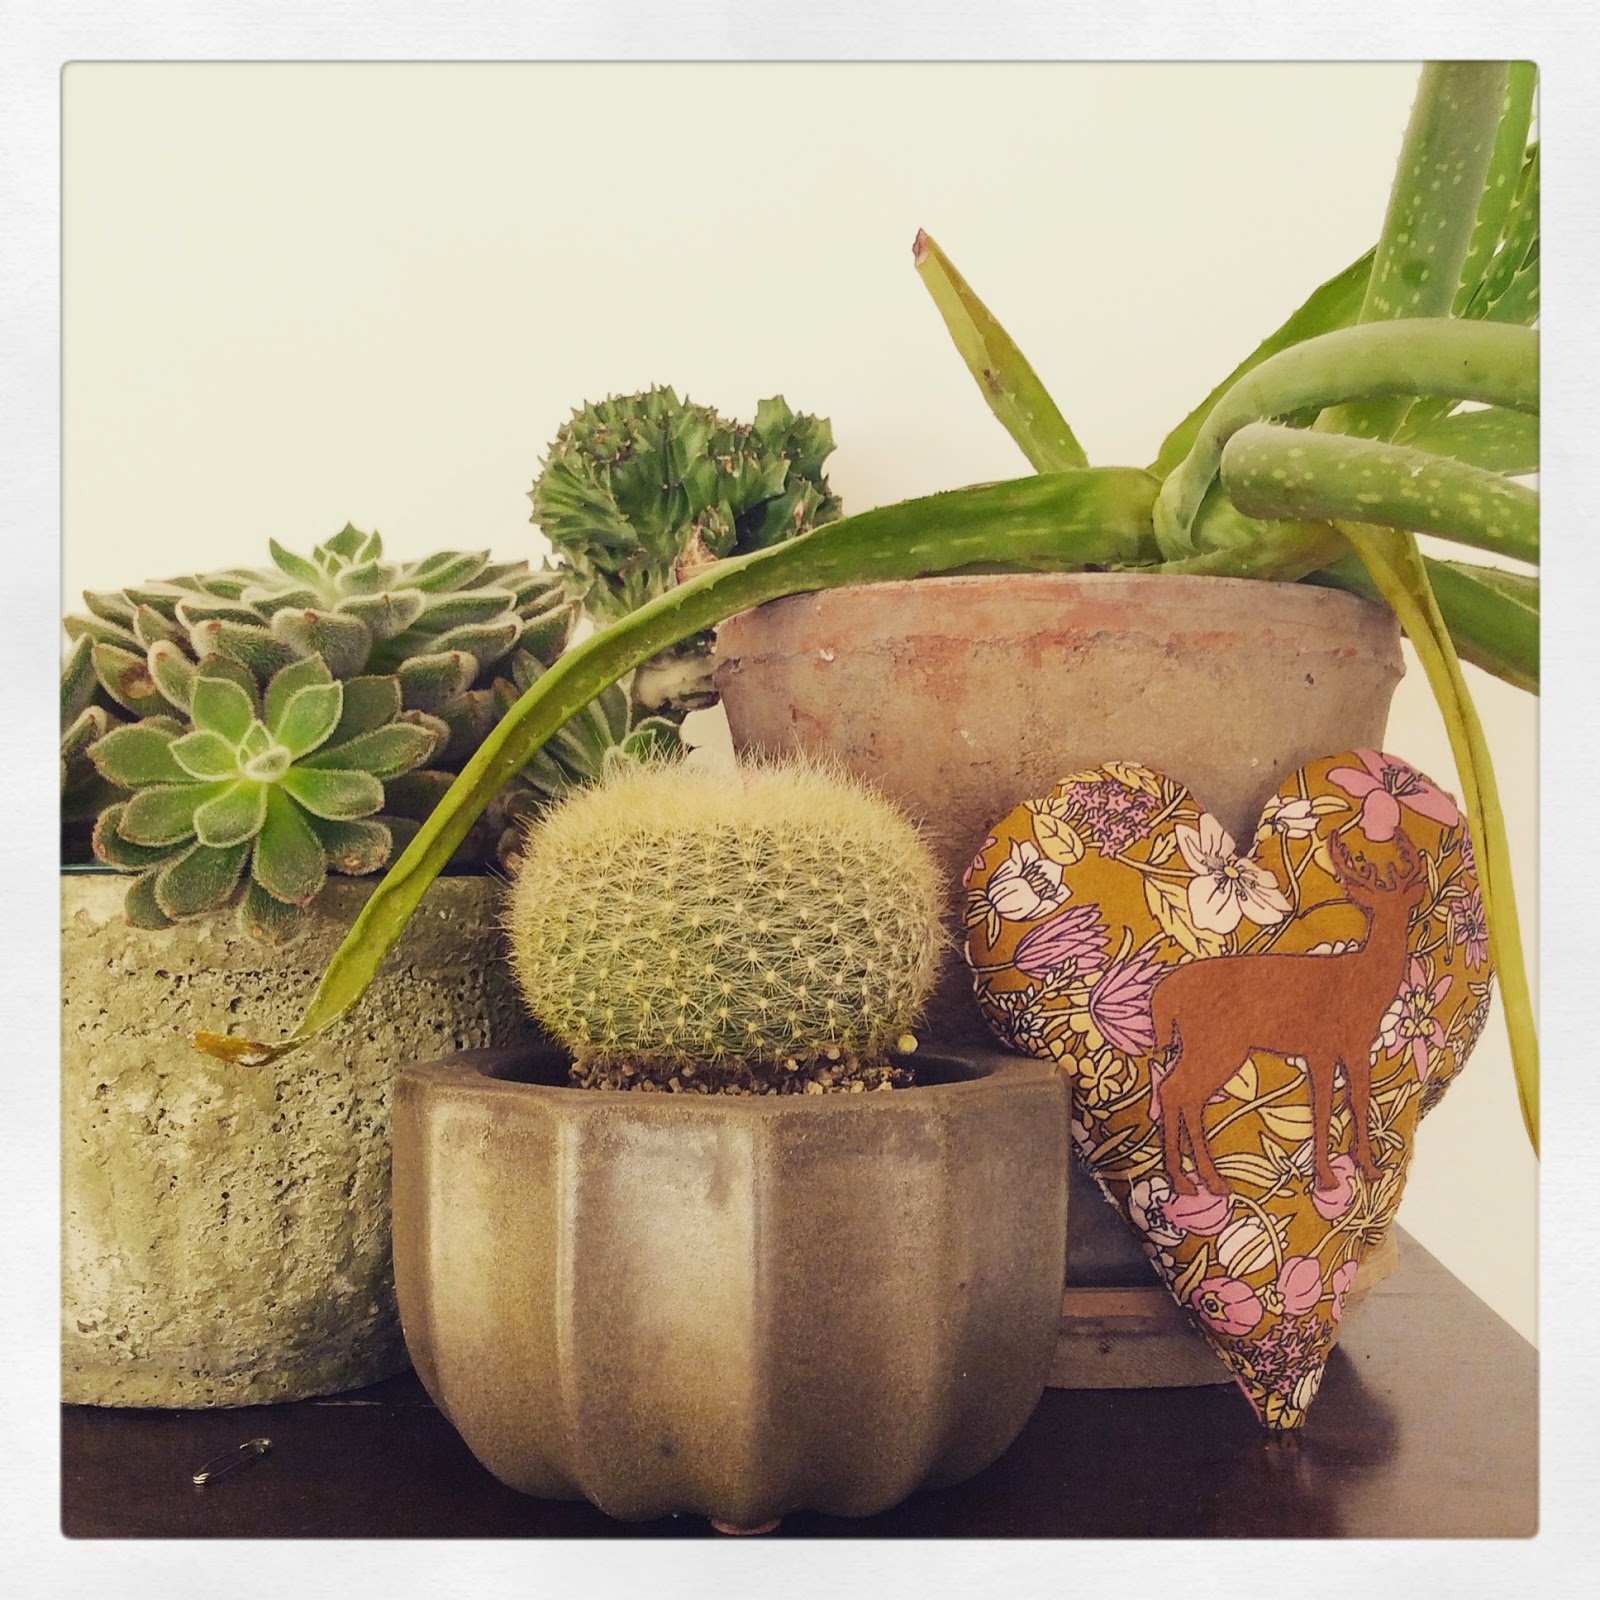
The project I was most excited about is this "family heart," which I think is the cutest thing ever! The idea is that whenever a family member goes away on business, or for a sleepover, or whatever, they can take this little heart pillow with them and know they are not alone. Sigh. Isn't that awesome? I stuffed mine with dried lavender so it smells lovely and decorated it with this iron-on deer, but you can decorate yours however you like. (The book suggests sewing a tiny woolen pocket to the front--to hold a love note, perhaps?)


Amanda Blake Soule's book gets five big, shiny stars from me. There are so many more projects I would like to try that I'll be renewing this one, fo shizzle! Till next time, friends...

Tuesday, January 13, 2015

Violet's Room Makeover/Wallpaper Tutorial

Last weekend we gave Violet's room a makeover, and it has become my favorite project to date! For those of you who know my five-year-old daughter, she definitely has her own sense of style. Part Jersey Shore, part rock-and-roll...what it ain't is remotely girly. But I wasn't ready to give her a skull and crossbones room (although Graham & Brown has a cool wallpaper for that: http://www.grahambrown.com/us/product/19911/skulls), so I went with this stunning pattern from Graham & Brown called Funky Flora, designed by 1960s British fashion icon Barbara Hulanicki.


The daisies are flocked velvet on an almost sheer, rice paper like background with tiny gold threads running through it. On the one hand it feels very sophisticated (especially in the inky purple, almost black shade), but the retro flowers give it such a happy vibe that I thought it could work in a kid's room. Still, I had some reservations: Would it be too overpowering? Too "old" for a five-year-old? As soon as I caught my first glimpse of the half-finished wall (that's my husband, the master wallpaperer), I had my answer. It was just perfect.


We did decide to only do one "feature" wall, as opposed to our original plan to paper the whole room. and I think this helped to keep the room feeling lighter. I love, love the result...and so does Violet!

Before


After


I changed the furniture around in Vi's room to create a little play area for her on the window side of the bed, while her chest of drawers and a mirror take up the opposite side. This layout gives the room more dimension and actually makes it feel larger. The canvas screen prints on the wall are from All Things Grow (www.marcydavy.com)


When it came to dressing the window, I decided to install a roller blind instead of curtains, as curtains covered too much of the wallpaper. I left the rod up so I could hang a garland from it (every little girl's room needs a garland if you ask me, even if your little girl dresses like Eminem) and that way it'll be all ready to go if I ever decide curtains are in order. To keep things bright and cheerful, I added a yellow quilt and framed some of Violet's paintings. 


I am totally hooked on wallpaper now. It has an impact you just can't get with paint and it's a lot easier than I ever thought it would be, especially with G&B's "Paste-the-Wall" paper. It only took my husband about two hours to do this wall from start to finish. So maybe I should say it is easy when you have a husband who appears to possess a natural talent for wallpapering (he claims there is "an art to it," which I'm beginning to believe after struggling with making the toy box pictured). Still, if you have the right tools and a smidge more patience than I have, I trust you can do this. :)

If you're interested, keep reading for a step-by-step pictorial of how to put up that wallpaper you've been dreaming about...

What you will need:

Wallpaper
Wallpaper paste 
Brush or roller for paste
Wallpaper brush 
Scissors
X-Acto knife 
Stainless steel ruler
Seam roller

You can buy a wallpaper tool kit at most home improvement stores for under $15 that comes with all of these items, minus the scissors and paste. That's a pretty snazzy deal, imho!

Now that you've got the tools, take the time to prep your wall before you start. Fix any imperfections (i.e. fill large holes) and sand smooth, then get rid of any dust. Make 50 lb puppies and curious  children watch from outside the room, and you're ready to roll...err, unroll and paste, that is. ;)

Step 1: Paste the Wall


Starting at the left-hand side of the wall, use a roller or a brush to spread the wallpaper paste on the wall for the entire length of the strip you are using and a bit wider than the paper's width.

Step 2: Hang the Paper


If you are doing the whole length of the wall, you can hang directly from the roll. Unroll paper and position the top edge near the ceiling. Smooth with the wallpaper brush as you work your way down the wall. For subsequent pieces, you will need to make sure patterns match up. When working with smaller areas, such as around windows, you may want to measure and cut your pieces first, remembering to allow for any pattern match when cutting. Always leave a couple of inches at the top and bottom for trimming. 


Step 3: Trim Excess Paper


Using a straight edge and an X-Acto knife, carefully trim extra paper at the top and bottom. (Note: This is trickier with flocked or textured wallpaper than the smooth stuff.)

Step 4: Smooth Seams


Once you have two sheets up, use your seam roller to smooth the seam by running the tool down the paper where the sheets meet.

That is pretty much it! If you can manage to stay focused on the work when responding to annoying comments like, "You haven't even started yet?" "That's all you've done so far?" you will be well on your way to success. Better yet, ship the kids off to Grandma's for the afternoon. Then, when you're all done, stand back and admire your handiwork. Stand back and admire it some more. And prepare yourself to do it again in a few months. I'm telling you...once you've wallpapered one wall/room, you will want to wallpaper every wall/room in the house. :)


Wednesday, January 7, 2015

A Touch of the '70s

I don't know about you, but after Christmas I always seem to get the urge to redecorate. Down come the tree and all the decorations and suddenly the house looks so...naked. It makes me wonder why it didn't bother me before.

Weird.

Anyway, I was thinking about how to punch things up a bit and was drawn--again--to my sad entryway. After taking down the Christmas display I had arranged on the wall above the console table, a single framed 16 X 20 print wasn't cutting it for me anymore. I had to do something more original...something that spoke more to the style of the rest of the house and who we are as a family.

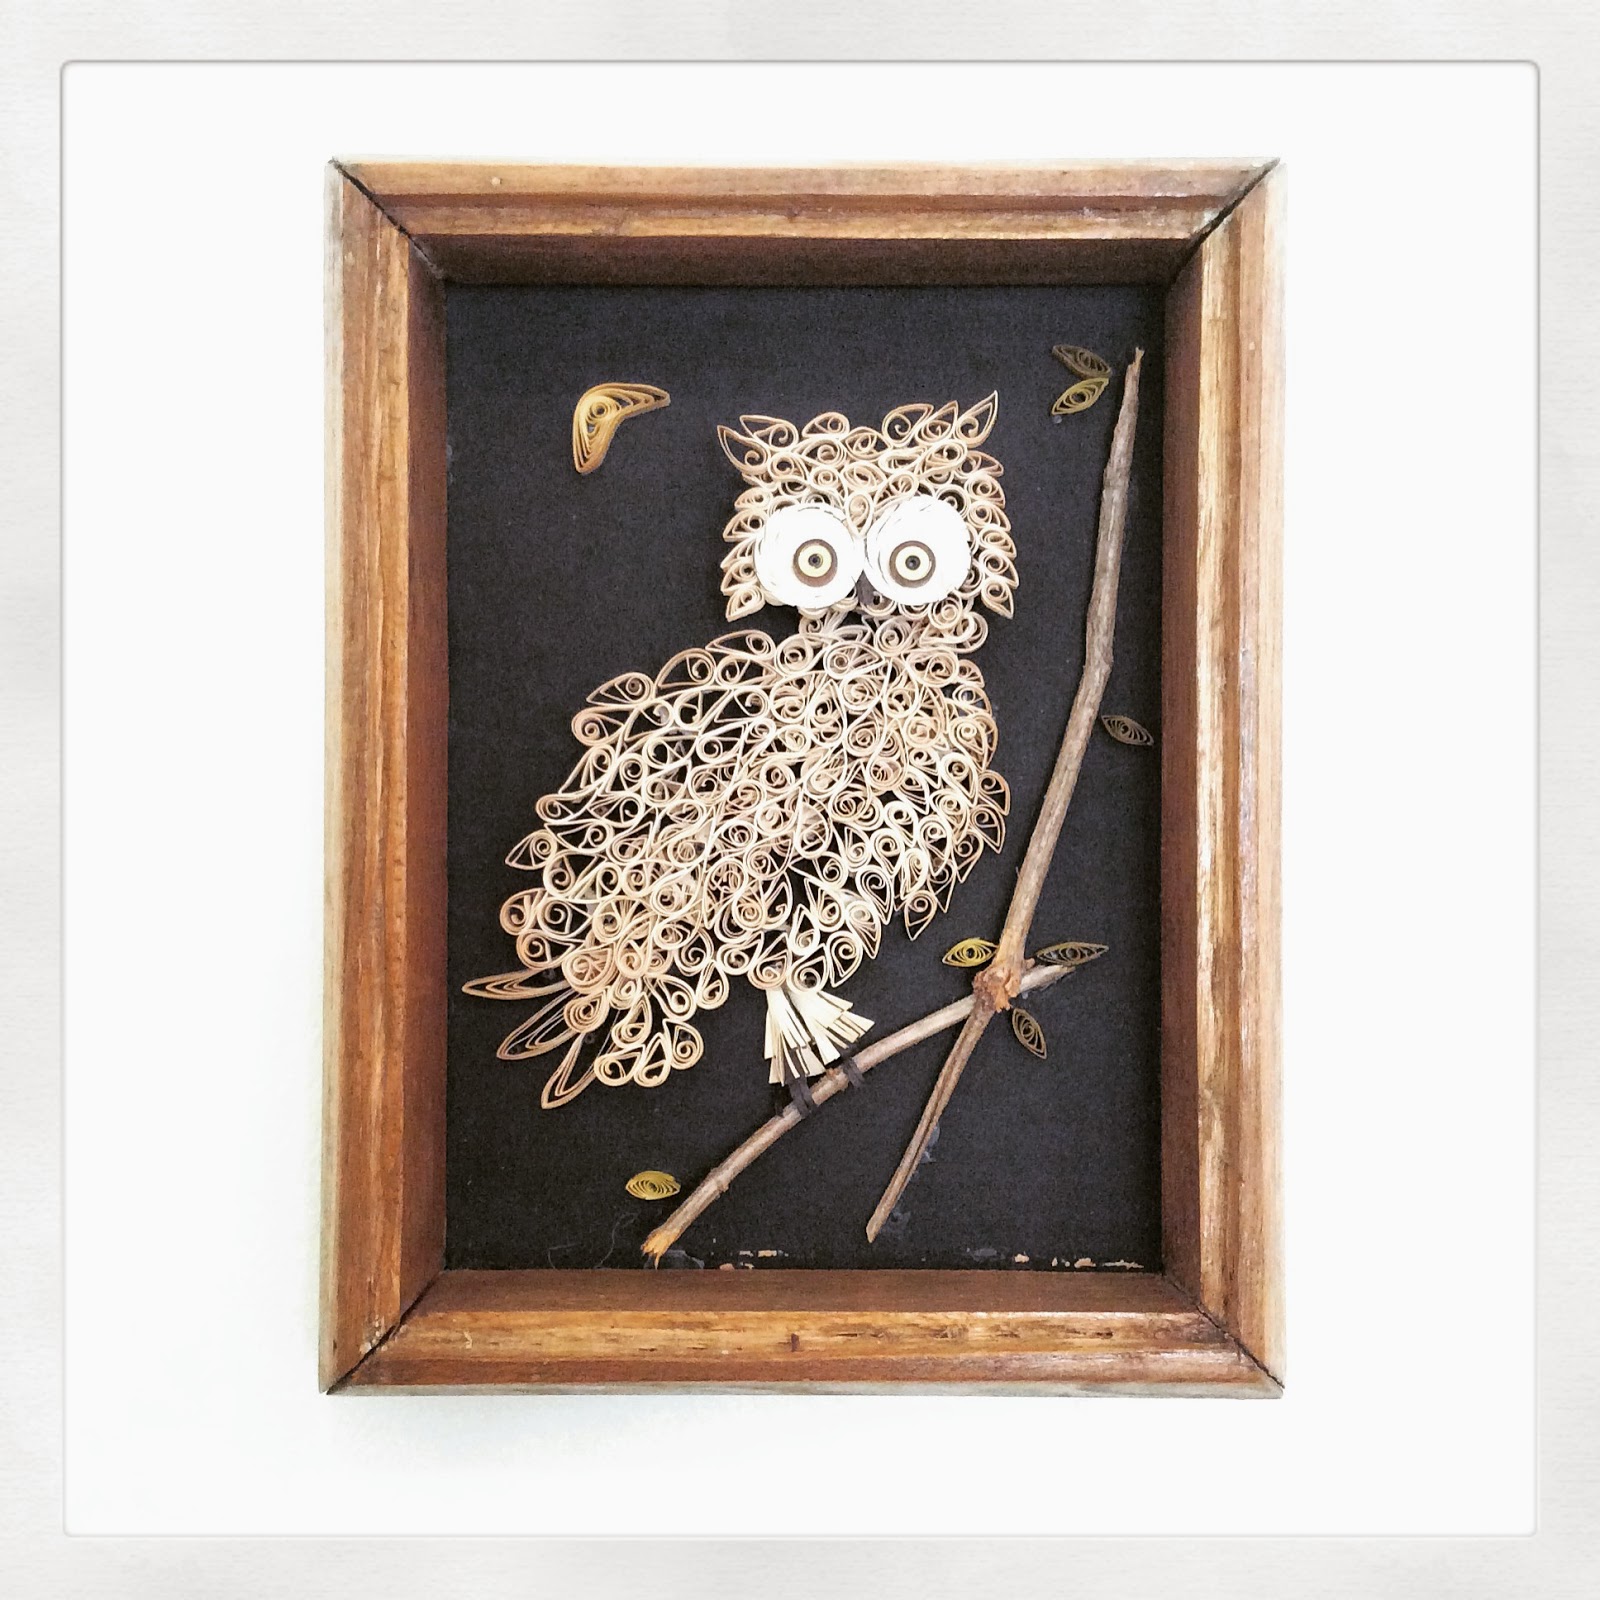
Enter my friend Melissa, who told me on the kids' first day back to school that she had bought me something at a thrift store over the holidays. She wasn't sure if I'd like it, but she thought I might. She could never have known that it was JUST what I needed!

Some 1970s handicrafts are cool. Most are hideous. I am still on the fence about where I stand on macrame plant hangers (leaning toward cool). But to my mind there's something quite lovely about this little piece of wood shaving art. (Who knew that was even a craft form? Seriously!)


It's just subtle enough in its folksy, vintage vibe that I thought it could blend in with other art that I had and not overtake it. And it totally inspired me to create a nature-inspired mini gallery wall above my console table that is just a little more interesting than what I had there before, using small artwork and picture frames I had lying around. Thank you, Melissa! I love it! <3


Then, while I was at Target shopping for a frame for a print my husband got as a gift, I stumbled on something I've been looking for forever. I've long wanted a wall hanging for my living room to fill the space above the TV, but most of the ones I'd seen were either way too expensive or too ugly. I couldn't believe my luck when I found this one by designer Nate Berkus at an awesome price point. I've loved Nate Berkus since I used to watch him on Oprah and I'm so happy his housewares line is available at Target. I was a little disappointed that the picture on the packaging made the wall hanging look twice as long, but ah, well. I still think it's cool beans. :) 


So, is a macrame plant hanger far behind? Probably not. I have a real yen for the 1970s that I can't seem to shake (a cleaned-up version, that is...someone please whack me over the head if I start extolling the virtues of shag toilet seat covers)!


Wednesday, December 10, 2014

Christmas Top Five

Ho Ho Holy Moley! I can't believe 2014 is almost over! Thank you so much for dropping in every now and again to see what's new on The Hydeout. I never imagined I would one day be blogging (ew...I still don't like that word), but I love writing about my adventures in home decorating and am looking forward to sharing some exciting new projects next year (read: bold wallpaper for the entryway and a possible fireplace refresh)!

So, I thought it would be relevant to end the year with my Top Five Christmas Decorating Ideas for a Warm and Cozy Family Home. And here they are, in no particular order...

# 1. Retro Hodgepodge Tree


I love a perfectly imperfect tree decorated with a mishmash of ornaments and tinsel and paper decorations the kids have made over the years. The trick to keeping it from looking tacky is sticking to a color scheme and a loosely applied theme (i.e. mine could be rustic vintage). I will take down any completely clashing ornaments the kids put up when they are not looking and hide them at the bottom of the Rubbermaid container. But anything nostalgic goes up, and my favorites are actually the paper decorations for the pops of white they lend to the tree, which really brighten it up.

#2. Mason Jar Snowscapes


This was an activity I did with the kids at one of our Christmas parties a couple of years ago after seeing similar jars in the Anthropologie catalog. All you need are some large Mason jars (vintage ones look nicer but any old spaghetti sauce jar will do), plastic figurines, bottle-brush trees or whatever you can imagine putting inside, Plasticine, sparkly fake snow from a craft store like Michaels, and some Elmer's glue. Begin by coating the inside of the lid with glue, then build up a small mound of Plasticine on the inside of your lid. Cover the Plasticine with glue and sprinkle with fake snow. Finally, insert your figures into the Plasticine, using more glue if necessary. Carefully place jar over top and secure tightly to lid. My friend's kid made one with a pewter owl figurine inside and it looked just like something you would buy at West Elm!

#3. Mid-Century Swedish Gnomes


                   I picked up this trio at a thrift store waaaay back. I love their wooden vintage looks and their expressive faces. I just bet these guys get up to no good when there is no one at home... ;) I have seen similar Scandinavian style gnomes at stores like HomeSense. 

#4. Shelf with Swag/X-mas Card Holder


To display our Christmas cards this year (BIG HUGS to those of you die-hards who still send these out), I thought I would attach some baker's twine to the garland decorating the display shelf above the entry to the living room, and hang cards with mini red paper clips I found at Target. Best thing is that it frees up the fireplace mantel for more decorations!

#5. Retro Plastic Light-up Santa


There is something about an old-fashioned Santa, whether he be the plastic light-up kind or a velvet-suited tree ornament type, that brings me right back to when I was a kid. This guy holds court in my living room every year and I just bought a bigger one to go in my yard this year at Value Village. 

And...One for Good Luck


I know I said I was only going to post a Top Five, but I couldn't resist throwing in this pic! 

Hope your holidays are merry and bright!

Peace, Love and Joy always,

Lara

Wednesday, November 19, 2014

Renegade Craft Fair NYC


This past weekend I took a trip to NYC with one of my oldest and bestest friends, and to my great joy and surprise the Renegade Craft Fair just happened to be in town. I have always enjoyed craft shows, from church bazaars to the Canadian creme-de-la-creme, the One of a Kind, but the Renegade was in a whole other league than even the OOAK. This show was chock full of hipster type Etsy sellers and the best part is there was no admission fee (take a cue from that, OOAK)! Martha Stewart American Made was on hand, doling out some freebies and giving some free craft lessons. I took part in a wood burning class, which was super cool, although I was a little disappointed with my end product. There was also an old-fashioned photo booth, yummy food vendors and lots of lumbersexuals on hand for eye candy (read cute boys with scruffy beards and checked shirts...seems to be a big trend in NYC) ;)

Other trends I noticed were all things fringed and tasseled and AIR PLANTS everywhere! By far the busiest booth was "Coral & Tusk," who sell textiles embroidered with whimsical animals and natural objects. They had big boxes filled with these embroidered fabric scraps for dirt cheap, and there were about 15 people at any given time trying to crowd into the 5 foot by 5 foot space...yikes! But it was worth getting a few elbows to the ribs to get these amazing finds, which I plan to turn into pillows:


I also couldn't resist this charming little terracotta Geo-Planter:


And, of course, I had to get myself something tasseled:


Finally, these teensy, delicate wishbone earrings in 14 kt gold rounded out my Renegade haul:


I was simply lucky that I happened to be in the city when this fantastic event was on, but it happens in different U.S. cities (and London, England) at different times, so if you are ever as lucky as I was to be in the right place at the right time, you must, you must go! http://www.renegadecraft.com/

Tuesday, November 4, 2014

Being Happy With What You Have

Yesterday, I was chatting with a friend who just bought a new house and she started asking me my opinion on some renovations she was considering. I actually had to tell her I wasn't the best person to ask as I have never done any major renovations...never taken down any walls, never replaced any kitchen cabinets, never installed new flooring. I guess you could say I've been pretty lucky--all three of the properties I have had the pleasure of owning with my husband were in pretty good shape when we bought them. But that's not to say  there aren't lots of changes I would love to make to our current 1960s house...just that when it comes down to taking a family vacation in the winter or splurging on a swanky new bathroom, Mexico wins.

The thing is, I really do want to live in a house that I feel good about. Heck, I have more books on interior design than I do cookbooks. I also really enjoy the challenge of making something not so spectacular look...well, if not spectacular then a heck of a lot better, just by flexing my creative muscles and avoiding spending too much cash.

In one of the first posts I ever wrote back in July ("The Living Room"), I talked a little bit about that giant eyesore--the outdated, multi-tonal stone/brick fireplace that I've been stressing about since we got this place in 2010. It just didn't fit with my vision of the living room and I felt like it threw the rest of the design out of whack. But, what to do?


Before

Well, it's taken almost four years of fussing around, but I have finally gotten to a point that I actually love our family hearth...and I NEVER thought I would say that. I've considered painting it white, and still might do so, but for now I can totally live with it. 


After

A few ways to live with what you have...and be happy with it:
  • Make liberal use of paint...it is the easiest, most cost-effective way to make a difference (read the "Living Room" post to see how I changed the color of the fireplace insert, which made the single biggest difference to the look of the fireplace).
  • Use accessories to add bold pops of color that distract from whatever it is you are trying to hide (in this case, the plants, books and even the cat bed are those colorful distractions).
  • Don't underestimate the importance of cohesiveness. Bringing in elements that are similar in color, texture, style and finish can make the overall space more pleasing to the eye, and hopefully help to camouflage the not-so wonderful aspects of the room (the rustic vibe of the barn wood mirror really did that for this room, as it echoes other rustic, wooden, vintage pieces in our living/dining room).
  • Invest in art. It doesn't have to be expensive, but art is beautiful and it always adds a touch of class to any room. The same goes for artfully framed photographs. And kids' art always makes a house feel cozy.
There you have it...embrace what you have! You just might be amazed at what you can live with, if you open your mind to the possibilities. :)