One more month until Christmas and I can hardly contain my excitement! Yes, I am one of those people who really LOVES Christmas...especially now that I'm a mom and I get to experience it through my kids' eyes. The Christmas concerts, the family get-togethers, the parties, the parades--I love it all, but I especially love decorating. This coming Sunday we'll go to the tree farm and chop down that most perfect of specimens to grace our living room for the season, but for now, it's all been all about this paper mounted deer. Faux taxidermy has become a real trend in wall decor, and I've wanted my own stag's head for a while. When I saw one made out of white cardboard in a magazine, I got fixated on making my own. And it turned out to be one of the funnest projects I've ever done.
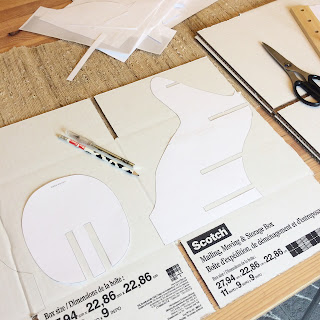
I found instructions online for making a mounted deer from foam board. (Thank you Spins & Needles blog!) It sounded super easy, which is always a bonus for me. I printed out the templates and got my husband to enlarge them to the size I wanted on his photocopier at work. Then, instead of tracing the templates onto foam, I chose to use white cardboard boxes, since I still anticipated making a white deer, and foam always makes me think of kids' crafts, and I didn't want this to look like my daughter made it out of one of those kids' craft kits from Michaels.
But when I finished cutting out all the pieces and put my deer together, it just looked a little lackluster--not like the one I saw in the magazine. It also wasn't the sturdiest. I started thinking maybe I should have used the foam. Then, as a last-ditch attempt to make it into something I would want to display, I decided to cover it with decorative paper as they suggested in the online tutorial. And it made all the difference.
I used a heavier weight decorative paper from a book of scrapbook paper I bought at Michaels months ago and which happened to have a faux wood grain paper that I wanted for the "mount." The papers in the book were all coordinating, which made it really easy to find papers that complemented each other, and the 12" x 12" size of the paper was a perfect fit for my templates. The stiffness of the paper also made the overall structure stronger.
But the coolest part of all that I totally wasn't anticipating was that my deer head turned out to be REVERSIBLE! I just used different patterns of paper on both sides of the deer "parts" and now I can have different looks. I call the first one with the floral antlers my "Georgia O'Keeffe-inspired" deer and the other one is my "Cozy Sweater" deer. I think I like "Georgia O'Keeffe" better, but I do like them both. I am SO happy with the outcome of this project, and I loved planning which papers to use. Which "look" do you like best? I would love to hear from you!


Ooh...I can't decide which I like better. They are both so great. I love the projects you do. I find many and complete none. You are a breath of fresh air to my days. Thank you for being you, a real inspiration.
ReplyDeleteThank you so much, Kim! And I am not a bit surprised that you're not crafting up a storm at the moment...you are one of the busiest moms I know! (And a true inspiration yourself :))
DeleteLOVE them!!!! I just hung up a set of age-old antlers this week. Overkill (no pun intended...) to put up two sets????
ReplyDeleteNah...especially not at Christmas! They add such a cozy, rustic vibe!
ReplyDelete